
Halfmoon Beauty Lamp: The Ultimate Lighting Solution for Professional Beauty Studios
1. Understanding Beauty Lighting Fundamentals
Why Proper Lighting Matters in Beauty Services
Professional beauty work demands precision that’s impossible to achieve without proper illumination. Studies show that inadequate lighting is responsible for up to 40% of service errors in beauty salons, including:
- Uneven makeup application
- Missed lashes during extensions
- Asymmetrical eyebrow shaping
- Incomplete nail polish coverage
- Overlooked skin imperfections during facials
Key Lighting Concepts Every Beauty Professional Should Know
Lux (Illuminance)
Lux measures the intensity of light falling on a surface. Professional beauty work requires:
- General salon lighting: 300-500 lux
- Detailed work (lashes, brows): 1,000-2,000 lux
- Precision work (microblading, PMU): 2,000-10,000 lux
Color Temperature (Kelvin)
- 2700K-3000K (Warm White): Creates relaxing ambiance, flattering for skin tones
- 4000K-4500K (Natural White): Mimics daylight, best for true color matching
- 5500K-6500K (Cool White): Maximum clarity for detailed precision work
CRI (Color Rendering Index)
CRI measures how accurately colors appear under artificial light compared to natural sunlight. For beauty work, a CRI of 90+ is essential, with 95+ being ideal for makeup and color services.
Shadow Management
Traditional overhead lighting creates harsh shadows that hide details. Professional beauty lighting should provide multi-directional illumination to eliminate shadows completely.
2. What Makes Halfmoon Beauty Lamps Different?
The Evolution of Beauty Lighting
Beauty salon lighting has evolved significantly:
- Traditional Overhead Lights (1980s-2000s): Basic fluorescent or incandescent bulbs
- Ring Lights (2000s-2010s): Circular design for photography and makeup
- Magnifying Lamps (2010s): Combined lighting with magnification
- Halfmoon Lamps (2015-Present): Specialized crescent design for professional beauty work
Halfmoon vs. Ring Light: What’s the Difference?
| Feature | Halfmoon Lamp | Ring Light |
|---|---|---|
| Design | 180° crescent arc | 360° complete circle |
| Best For | Close-up precision work | Photography, video |
| Shadow Elimination | Excellent (directional) | Good (frontal only) |
| Workspace Access | Unrestricted from top | Requires working through center |
| Professional Use | Salons, studios | Content creation, makeup |
| Positioning Flexibility | Superior | Limited |
The Science Behind the Crescent Shape
The halfmoon design provides asymmetric illumination that’s optimized for beauty work:
- Top-down lighting: Mimics natural daylight angle
- Side illumination: Reveals texture and dimension
- Open design: Allows unrestricted access to the client
- Focused beam: Concentrates light where needed without spill
3. Choosing the Right Beauty Lamp for Your Needs
Factors to Consider
Your Primary Services
- Lash & Brow Artists: Prioritize high lux output (8,000-10,000) and cool white temperature
- Makeup Artists: Need adjustable color temperature for different environments
- Nail Technicians: Require true color rendering (CRI 95+) for polish matching
- Estheticians: Benefit from warm-to-neutral temperatures for client comfort
- PMU Artists: Need maximum brightness and shadowless precision
Workspace Configuration
- Mobile technicians: Choose lightweight models with easy assembly
- Fixed stations: Can accommodate heavier, more stable professional models
- Small spaces: Consider compact designs with minimal footprint
- Multi-service salons: Invest in versatile lamps with full adjustability
Budget Considerations
- Entry-level ($80-$150): Basic functionality, manual controls
- Mid-range ($150-$300): Remote control, memory function, better build quality
- Professional ($300-$500): Premium materials, advanced features, extended warranty
- Luxury ($500+): Designer finishes, smart controls, lifetime support
Essential Features Checklist
✅ Adjustable color temperature (minimum 2 settings)
✅ Dimmable brightness (stepless or minimum 10 levels)
✅ CRI rating of 90+ (95+ preferred)
✅ Flexible positioning (360° rotation, height adjustment)
✅ Stable base (weighted, non-slip)
✅ Flicker-free technology (DC power supply)
✅ Heat management (low-temperature LEDs)
✅ Certifications (CE, RoHS, FCC minimum)
✅ Warranty (minimum 1 year)
✅ Replacement parts availability
4. Installation and Setup Guide
Unboxing and Assembly
Step 1: Inventory Check
- Main lamp head with crescent LED ring
- Adjustable arm sections (usually 2-3 pieces)
- Floor stand pole
- Weighted base
- Power adapter
- Remote control (if included)
- Assembly tools and hardware
- User manual
Step 2: Base Assembly
- Attach the main pole to the weighted base
- Ensure all screws are tightened securely
- Check stability by gently pushing—the base should not tip
Step 3: Arm Installation
- Connect arm sections in order (usually labeled)
- Tighten adjustment knobs at each joint
- Attach the lamp head to the final arm section
- Route the power cable through cable management clips
Step 4: Electrical Connection
- Connect the power adapter to the lamp
- Plug into a grounded electrical outlet
- Test all functions before positioning
Optimal Positioning for Different Services
Eyelash Extensions
- Position lamp directly above and slightly behind the client’s head
- Height: 120-140cm from the floor
- Angle: 45-60 degrees toward the face
- Distance: 30-40cm from the work area
Eyebrow Services
- Position above and in front of the client’s forehead
- Height: 140-160cm
- Angle: 60-75 degrees
- Distance: 25-35cm
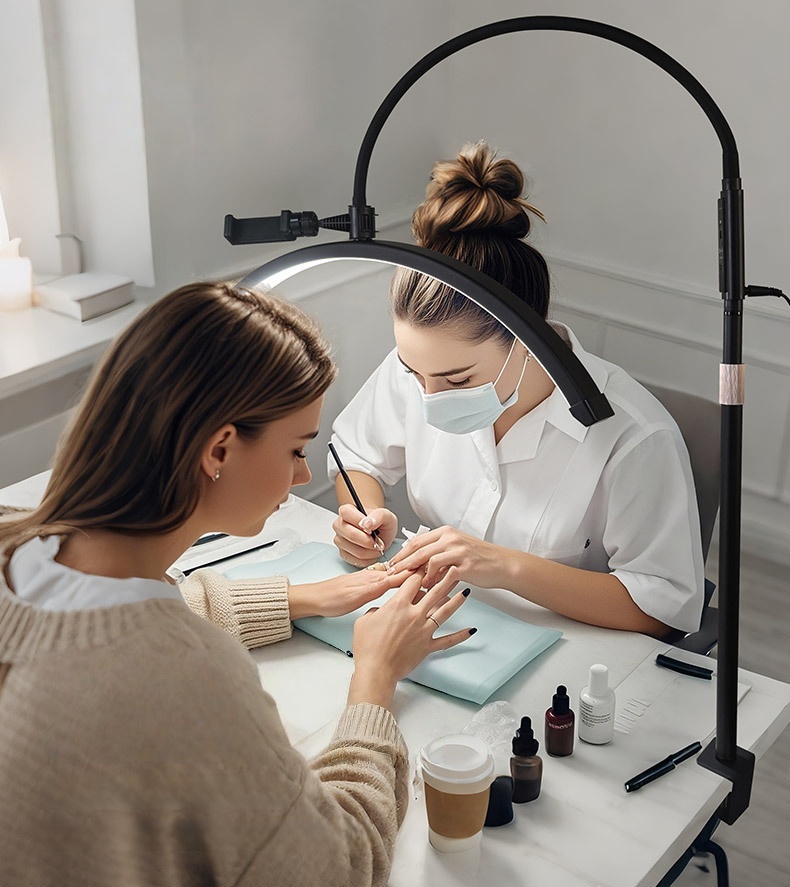
Nail Services
- Position above the nail table
- Height: 100-120cm
- Angle: 70-90 degrees (nearly overhead)
- Distance: 40-50cm
Makeup Application
- Position in front and slightly above the client
- Height: 150-170cm
- Angle: 45-60 degrees
- Distance: 50-60cm
Safety Considerations
⚠️ Electrical Safety
- Use only the provided power adapter
- Ensure outlet is properly grounded
- Keep cables away from water sources
- Don’t overload electrical circuits
⚠️ Physical Safety
- Position base where it won’t be tripped over
- Secure all adjustment knobs before use
- Don’t exceed maximum height extension
- Keep lamp away from heat sources
⚠️ Eye Safety
- Don’t look directly into LEDs at maximum brightness
- Use appropriate brightness levels for each task
- Take regular breaks to rest eyes
- Consider blue light filtering glasses for extended use
5. Maintenance and Care Tips
Daily Maintenance
Cleaning the LED Surface
- Use a soft, dry microfiber cloth
- For stubborn marks, slightly dampen cloth with water
- Never use alcohol, acetone, or harsh chemicals
- Clean gently to avoid scratching the LED cover
Checking Stability
- Verify base is secure and level
- Tighten any loose adjustment knobs
- Ensure cables are properly routed
Weekly Maintenance
- Wipe down the entire lamp structure
- Check all joints for smooth operation
- Test all brightness and color settings
- Inspect power cable for damage
Monthly Maintenance
- Deep clean all surfaces
- Lubricate adjustment joints if needed (use silicone spray)
- Test remote control battery
- Verify all functions work correctly
Troubleshooting Common Issues
Problem: Lamp flickers
- Check power connection
- Try a different outlet
- Verify adapter is functioning
- Contact manufacturer if issue persists
Problem: Brightness not adjusting
- Replace remote control battery
- Reset lamp (unplug for 30 seconds)
- Check for firmware updates (smart models)
Problem: Lamp won’t stay in position
- Tighten all adjustment knobs
- Check for worn joint components
- Ensure weight is properly distributed
Problem: Color temperature won’t change
- Verify lamp has multiple color modes
- Check remote control functionality
- Reset to factory settings
Extending Lamp Lifespan
✅ Turn off when not in use (saves energy and extends LED life)
✅ Avoid maximum brightness unless necessary
✅ Keep away from moisture and extreme temperatures
✅ Store properly if transporting frequently
✅ Use surge protector to prevent electrical damage
✅ Schedule professional inspection annually for commercial use
6. Frequently Asked Questions
Q: How long do the LEDs last?
A: Quality halfmoon beauty lamps use LEDs rated for 50,000+ hours. With average use of 8 hours daily, this equals approximately 17 years of service.
Q: Can I replace the LEDs when they burn out?
A: Most modern designs use integrated LED modules. Contact the manufacturer for replacement options, though with proper care, LEDs should last the lifetime of the lamp.
Q: Will the lamp get hot during use?
A: Quality LED lamps emit minimal heat. The lamp head may become slightly warm after extended use, but should never be hot to the touch.
Q: What’s the difference between cheap and expensive models?
A: Key differences include:
- LED quality (CRI, brightness consistency, lifespan)
- Build materials (plastic vs. aluminum)
- Electronic components (flicker-free drivers)
- Adjustment mechanism quality
- Warranty and support
Q: Can I use it for photography or video?
A: Yes, but ring lights are typically better suited for photography. Halfmoon lamps excel at close-up precision work rather than broad illumination.
Q: Is it suitable for home use or only professional salons?
A: Halfmoon lamps are excellent for both! Home-based beauty professionals and hobbyists benefit from the same quality lighting as commercial salons.
Q: How much does it cost to run?
A: A 50W lamp running 8 hours daily costs approximately $1.50-$3.00 per month depending on local electricity rates.
Q: Can I travel with it?
A: Most models disassemble for transport. Look for models with carrying cases if you’re a mobile technician.
Q: What certifications should I look for?
A: Minimum: CE (European safety), RoHS (environmental), FCC (electromagnetic compatibility). Premium models may also have ETL or UL certification.
Q: Do I need a dimmer or is on/off sufficient?
A: Dimming capability is essential for professional use. Different procedures and client sensitivities require different brightness levels.
Conclusion: Investing in Quality Lighting
A Halfmoon Beauty Lamp represents a significant upgrade for any beauty professional serious about delivering exceptional results. The combination of shadowless illumination, adjustable settings, and ergonomic design makes it an indispensable tool that pays for itself through:
- Improved work quality leading to better client retention
- Reduced eye strain allowing longer productive work hours
- Enhanced professional image attracting premium clients
- Versatility serving multiple service types with one investment
When selecting your halfmoon beauty lamp, prioritize quality over price. A well-made lamp will serve you reliably for years, while a cheap alternative may require replacement within months.
Ready to transform your beauty workspace with professional-grade lighting? Choose a halfmoon beauty lamp that matches your specific needs and experience the difference that proper illumination makes in your daily work.